
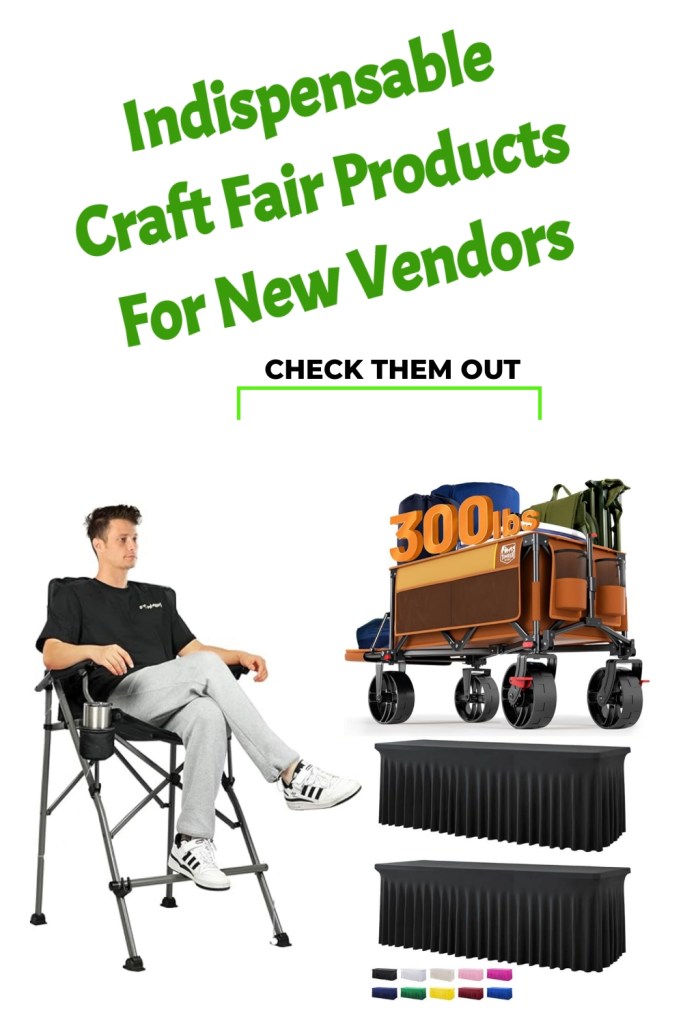
I have been doing craft fairs since 2016. Along the way I have learned a lot from failures as well as success. Whether you are just beginning and don’t know where to start or you are looking to take your setup to another level, this article is for you.
From the basics like tables and tablecloths to a Jackery Power Station, I’ve assembled some of my favorite things – and things I wish I had before I signed up for my first craft fair.
This page contains affiliate program links, which may pay a small commission if a purchase is made after using an affiliate link, at no cost to the reader. As an Amazon and Etsy affiliate, I earn from qualifying purchases.
Folding Tables for Craft Fairs
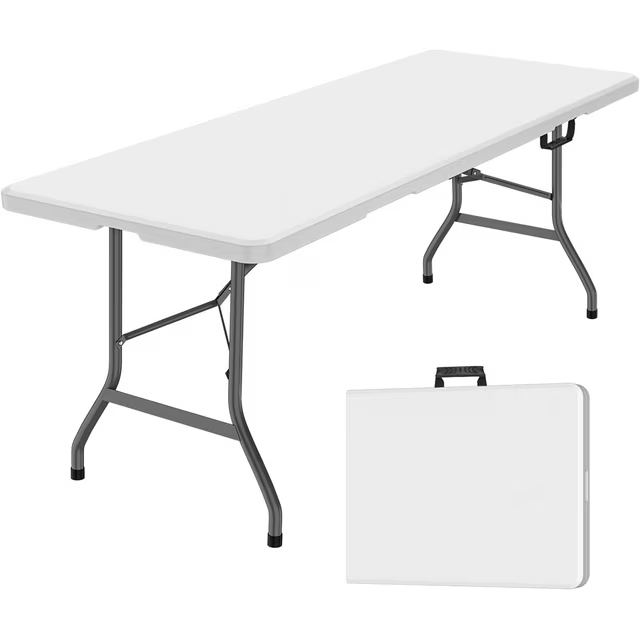
Each craft fair is unique with the space requirements. Some will offer 6 foot spaces, others 8 foot, and others a full 10×10 space. It’s best to have a few tables in different sizes to give you the best flexibility in your setup.
I strongly recommend getting a Heavy Duty table. You’ll have customers leaning on your table so you need to make sure the underside legs lock into place. You’ll also be putting it up and taking it down much more frequently than the occasional 4th of July backyard BBQ. So you’ll need a sturdy one to take a beating.
If you can only have one to start, begin with a 6 foot table as that will be your most versatile. You can add other sizes once you know what typical spaces you get to display within.
- 4 Foot Tables Shop Now on Amazon (affiliate link)
- 6 Foot Folding Tables Shop Now on Amazon (affiliate link)
- 8 Foot Tables Shop Now on Amazon (affiliate link)
Table Risers
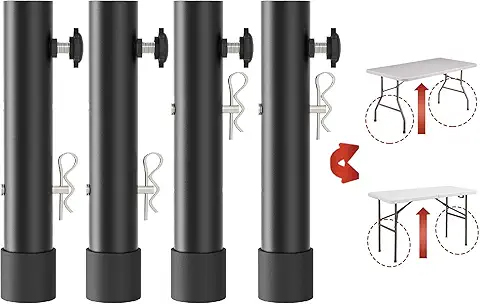
Sometimes you may want to raise your table up just a little bit. This helps bring products a bit closer to eye level – which is where most people shop. (Hint that is why the best location for items in the grocery stores is at eye level, and the “cheap seats” are the bottom & top shelves.
- Shop Table Risers on Amazon (affiliate link)
Floor Length Fitted Tablecloths

I’ve seen everything from plastic tablecloths from the dollar store to stretchy tablecloths – but to me the classic option is the squared fitted tablecloth.
What I love about these are they will hide any boxes or totes you stored under the table out of view of customers. Because they are fitted, they won’t have excess material on the floor (a tripping hazard) and will fully cover the table.
- 4 ft Fitted Shop Now on Amazon (affiliate link)
- 6 ft Fitted Shop Now on Amazon (affiliate link)
- 8 ft Fitted Shop Now on Amazon (affiliate link)
Stretch Pleated Tablecloths
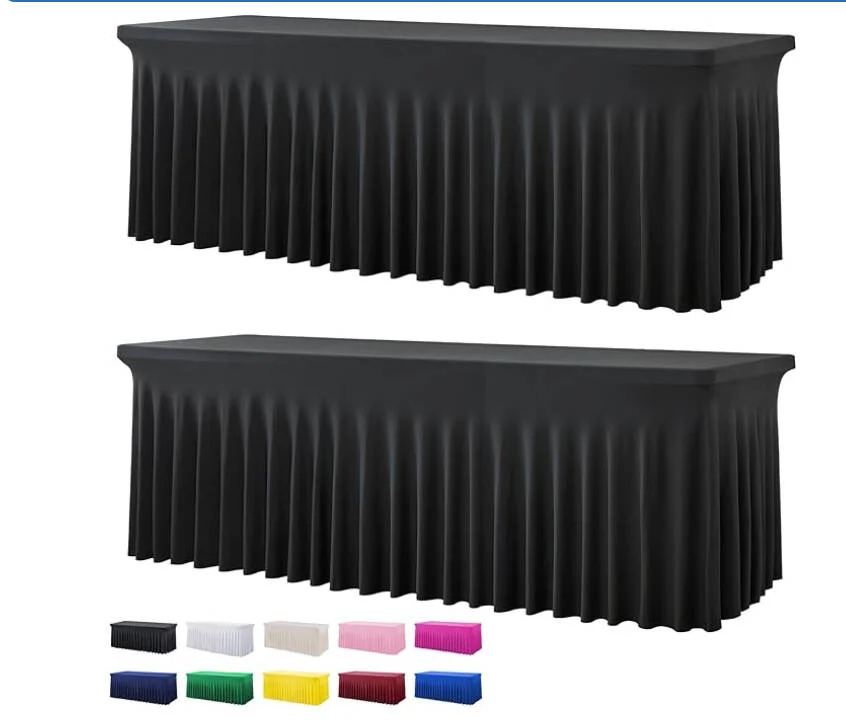
I recently switched from the traditional squared tablecloths to these stretchy ones. Why? the other ones end up having wrinkles no matter what you try. These stretch tightly across the top of the table and have pleats. I’ve literally rolled them up in a ball after events and they remain clean.
- 4 ft Stretch Pleated Shop Now on Amazon (affiliate link)
- 6 ft Stretch Pleated Shop Now on Amazon (affiliate link)
- 8 ft Stretch Pleated Shop Now on Amazon (affiliate link)
What Color Should I Get?
Although tablecloths are available in a variety of colors – stay neutral in your choice (unless you are a food vendor) – and let your products pop. Bright colors or patterns can distract from your products.
I have sets in a ivory, black, and dark blue and choose based on the season.
Easy Checkout Stand
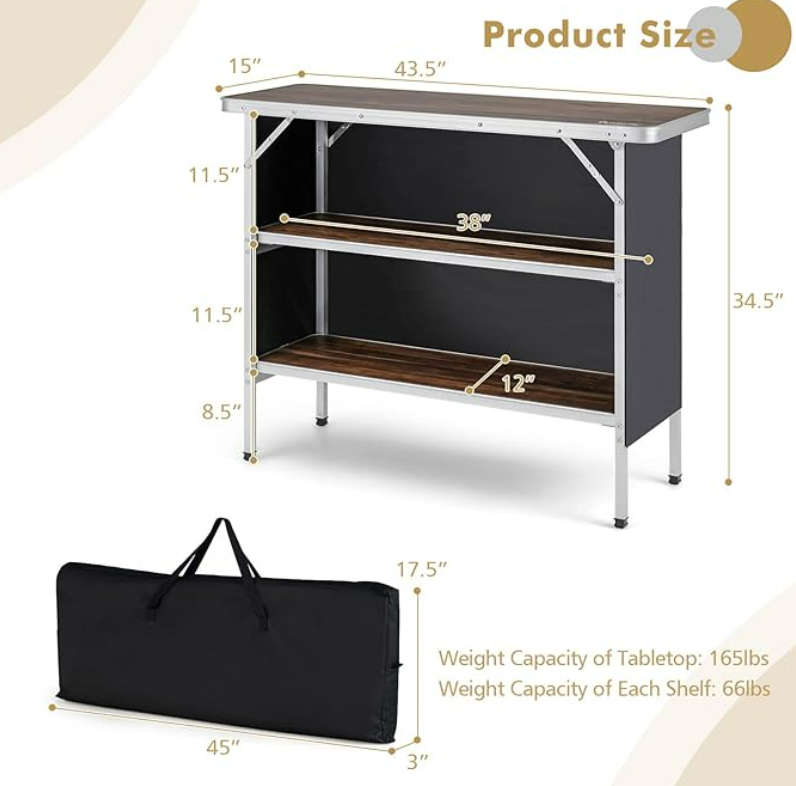
Okay, hear me out. I love this camping bar table because it is taller than a standard table which makes this a Perfect location for your checkout stand. It has removable shelving so you can store all your bags, supplies, lunch and beverages nicely hidden away from customer view.
The table is VERY lightweight since it is aluminum – plus it comes in a carry bag with a shoulder strap. It’s up in minutes and ready to go.
- Shop Now the Camping Table Checkout Stand on Amazon (affiliate link)
Sitting Pretty
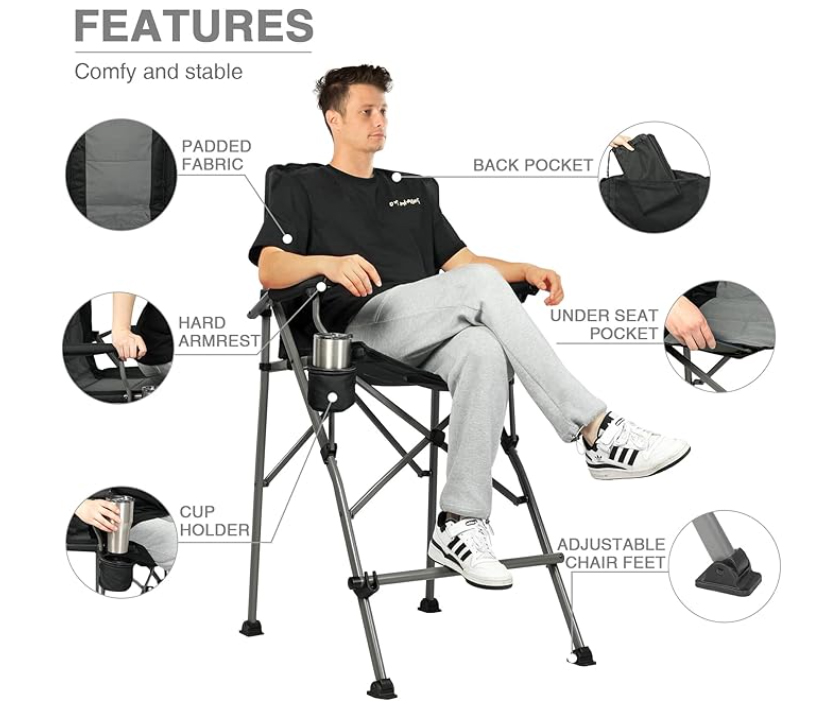
Sitting low and behind your display can cost you sales. If standing for the entire show isn’t an option then get yourself a good Directors Height chair.
That way even when seated, you’ll still be able to have great eye contact with your shoppers. This is the one I use, and it folds nicely to take up less space for transport.
- Shop Now Tall Directors Chair on Amazon (affiliate link)
Collapsible Wagon
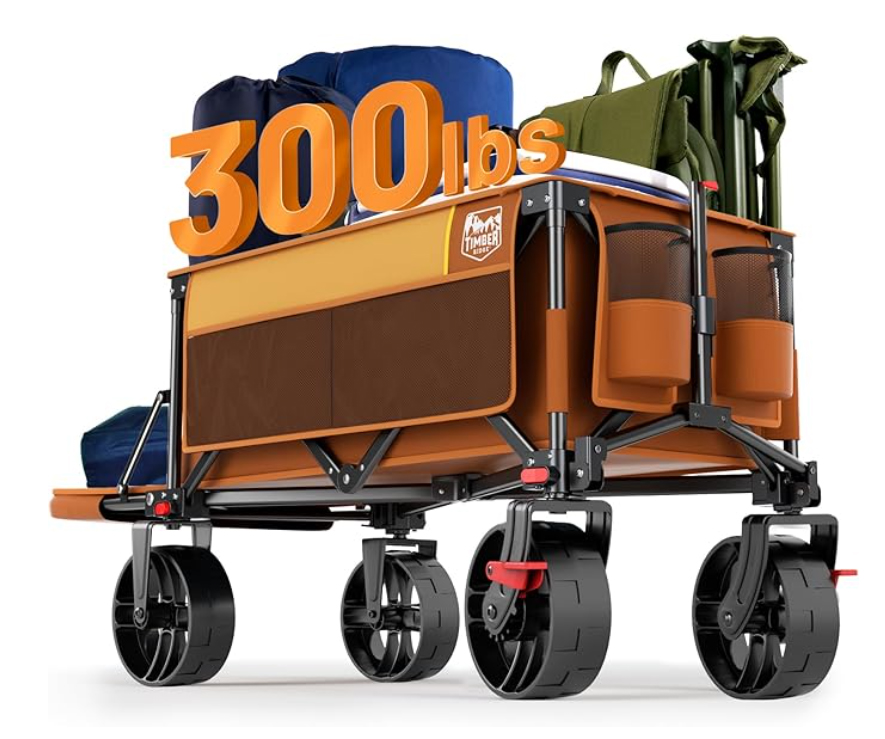
Once you arrive at the fair, you may need to bring all your items into the location and then after it’s over back out to your car. Trust me, you don’t want to carry everything by hand! Whether in a school or church – or out in a field, a collapsible wagon is a game changer.
Make sure to get one that has a drop-down rear tailgate for your items and boxes. The fact it folds down means you have more room in your car or truck for actual merchandise.
- Collapsible Wagon Shop Now on Amazon (affiliate link)
Wood Riser Shelves
Add height to your table and bring products up to eye level.
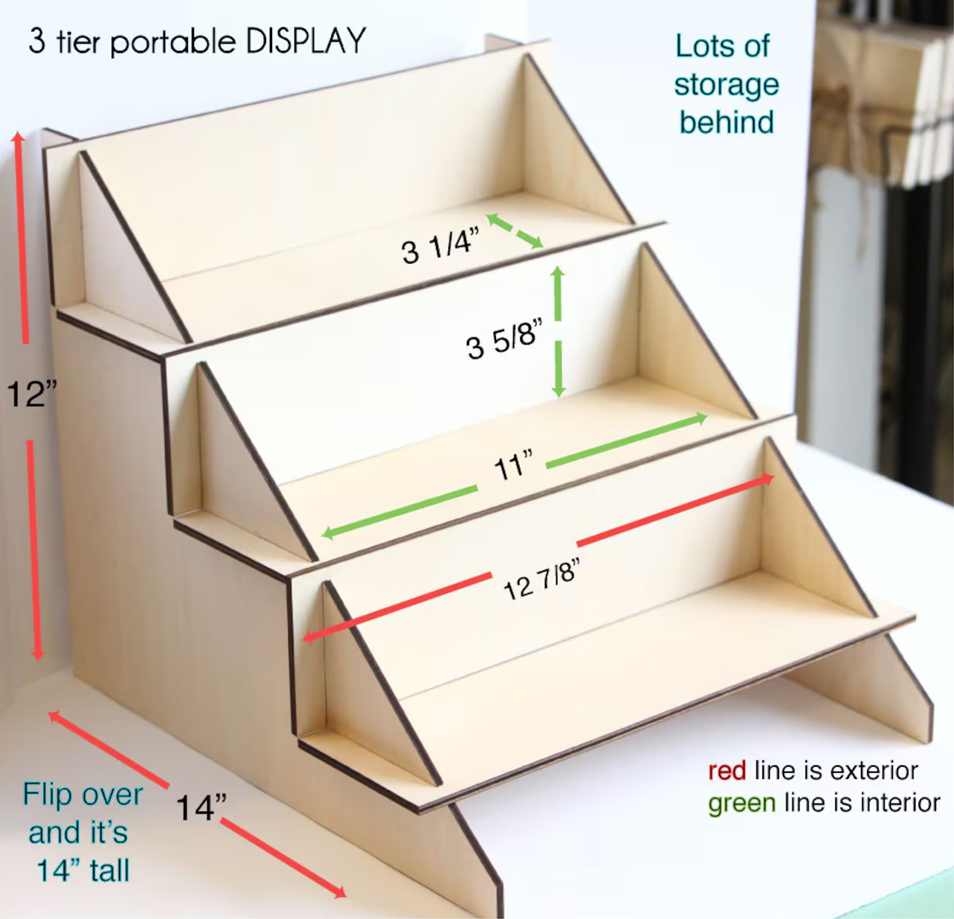
One of the best things you can do is to build height on your table display. Not only does it give more visual interest, but it allows items at the back to be seen more clearly and at eye level. If everything is flat on a table – it just doesn’t look inviting.
You can accomplish this a few different ways. Either by using wooden crates or by using stepped up risers.
I love the wood shelving from Farmapharma (shop now) on Etsy. they are made of lightweight wood and they break down flat which makes transporting them to your craft fair easy.
Power Anytime, Anywhere
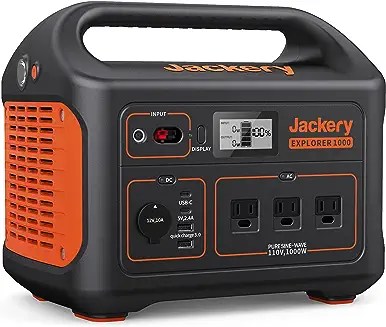
Not every craft fair will you have access to electric, or sometimes you will be charged extra. I prefer to have my Jackery Power Station with me and ready to go.
I will plug in my phone and my Square contactless chip reader docking station in the USB ports. I then plug in a surge protector and plug in all my LED lighting, as well as my motorized rotating Christmas ornament stands.
They come in a variety of power output – so get the one that best meets your needs based on how long your average show is, and what all you need to have running during that time period.
- Shop Jackery Power Stations on Amazon (affiliate link)
Wrap-Up
Over time you will revamp and shift and alter your booth setups. It is a process that everyone goes through. Don’t feel you need to get everything everywhere all at once.
What’s listed here are some of the basics to start you on your journey. My suggestion is to set a little money aside after each show to go toward the next booth improvement idea/product.
At the end of the day it’s all about your products and your booth setup is simply a way to showcase them.
Best wishes on your success!


Leave a comment